TbXie's Cyclone Slayer Build Guide Gear, Jewels and Flasks (PoE Settlers of Kalguur 3.25)
Early Game
Foreword to Itemization in PoE
Why is the guide using so many rares & can I use these Uniques?
Whilst a general consensus in ARPG Video Games is that the higher the rarity of an item, the better it becomes, Path of Exile is not necessarily constructed like that. Unique Items can generally be divided into two segments. Those who enable a build because they a specific effect on them which are then combined with Rare Gear items which completement the build-enabling item and those who are placeholders that fix certain things until you can actually upgrade it with better rolls on Rare Gear pieces. Outsides of specific Mechanics, replacing items with random Uniques is not great. However, whenever you feel like they fill your gaps correctly, feel free to use them as placeholders.
Resistances & Attributes
One can never emphasize enough how important Elemental Resistances are on gear. The game is constructed around playing with at least 75% Elemental Resistances & ideally a bit of Chaos Resistances too. Therefore, you should always be looking to cap your Resistances. They should be capped starting from Act V until the end of your progression and you should try to upgrade with Chaos Resistance where you can as you progress through maps. Additionally, people generally have issues finding enough Attributes on builds. Do note that almost every class paths through a passage where they can pick a +30 to Intelligence, Strength or Dexterity and there is no shame in doing so whilst you are still preparing your better gear.
Flasks
Another thing heavily overseen by newer & veteran players alike is the strength which lies in your Flasks. As soon as you hit maps, you should have a bunch of  Orb of Alterations and you should try to get some lower tiers of the affixes you want on your Flasks according to the guide you’re following. You should aim to have at least some form of useable Flasks when you’re starting maps & you should aim to have the right Magic Flasks right around when you enter Yellow maps. Obviously, expensive Unique Flasks, can be added in later.
Understanding Gear & Character Progression
Where as all guides generally suggest some kind of specific modifiers on Gear, it’s important that these things are “ideal cases”. Generally, when you start your journey through maps, you wanna aim for mostly Life & Resistances on all of your gear (outside of weapons) just to make sure you’re capped Resistances & have a decent health pool. This will, generally, do you just fine for a while. At this point, you’re still mostly carried by your Skill Gems & Passive Skill Tree. Therefore, make sure that you have all suggested gems when you start doing maps and have fixed your links & sockets when you’re able to. Lastly, do not forget to quality your gear using  Armourer's Scrap‘s. This is a multiplicative bonus to all the defenses found on your item.
Choosing your Gear
How am I supposed to digest the information that is here to obtain the modifiers that are most relevant on my items.
Generally, we try to give you order of importance on every affix which you could be obtaining by putting them in order of priority. Sometimes, the list will have a mentioned mod that is mandatory, which means that (in later stages of progress) this modifier is build-enabling. Other than that, if you follow the priority list and try to obtain as many of the modifiers on the mentioned items as possible, you should be doing fine. Obviously, the more modifiers that are relevant, the merrier.
Additionally, we have applied a colour code to showcase which part of your character gets enhanced.
(🗡️ Damage,🛡️ Defenses,💎 Quality of Life)
Armour Pieces
Helmet
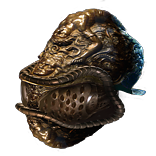
Unique  Abyssus
______________________________________________________
Explicits
______________________________________________________
- 🗡️ +#% Melee Critical Strike Multiplier – Ideally > 120
- 🛡️ #% increased Physical Damage taken – Ideally at most 41
- 💎 +# to all Attributes – Ideally 25
______________________________________________________
Body Armour
Armour Chest Piece
______________________________________________________
Explicits
______________________________________________________
- 🗡️ Socketed Attacks have -# to Total Mana Cost – 15
- 🗡️ Attacks have +# to Critical Strike Chance – Ideally > 1.8%
- 🗡️ You can apply an Additional Curse
- 🛡️ {Benchcraft} #% chance to Block Attack Damage – 7
______________________________________________________
Crafting Guide: You buy two items, one with -# to Total Mana Cost, one with Attacks have +# to Critical Strike. You then use an  Awakener's Orb which will combine both of them. You now craft “Suffixes Cannot be Changed” and go to the Harvest bench and use “Reforge Caster”. Finish off with crafting the Block Chance.
Body Armour
Armour Gloves
______________________________________________________
Implicits
______________________________________________________
- 🗡️ +#% Increased Attack Speed
- 🗡️ Attacks have a #% chance to Maim on hit
Explicits
______________________________________________________
- 🛡️ +# to Maximum Life
- 🛡️ +#% to Elemental / Chaos Resistances – As much as you can find!
- 🗡️ +#% Increased Attack Speed
- 🗡️ {Benchcraft} #% increased Damage While Leeching
______________________________________________________
Boots
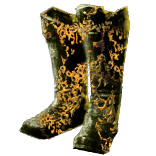
 The Stampede or
  Replica Stampede
______________________________________________________
Implicits
______________________________________________________
- 🗡️ {Anoint} Allocates Disciple of the Unyielding
Explicits
______________________________________________________
No Relevant Modifiers
______________________________________________________
Belt
* Ryslatha's Coil
______________________________________________________
Explicits
______________________________________________________
- 🗡️ #% less Minimum Physical Attack Damage – As low as possible
- 🗡️ #% less Maximum Physical Attack Damage – As high as possible
- 🛡️ +# to Maximum Life – Ideally > 90
______________________________________________________
Ryslatha’s is your last upgrade because you can use this slot to fill out resistances. Just wear a nice 170 Life + High Resistances belt until in the VERY lategame where you can maximimze all of your Resistances / Attributes on other gear and don’t need this slot anymore
Accessories
Amulet
Rare Dex/Int Amulet
______________________________________________________
Implicits
______________________________________________________
- 💎 +# to Attributes – As needed
- 🛡️ {Anoint} – Allocates Enigmatic Defense
Explicits
______________________________________________________
- 🛡️ +#% to Elemental Resistance – Until Capped
- 💎 +# to All Attributes – As needed#
- 🛡️ +# to Maximum Life – Ideally > 120
- 🗡️ +#% to Global Critical Strike Multiplier – Ideally > 35
- 🗡️ +#% to Global Critical Strike Chance – Ideally > 35
- 🗡️ {Benchcraft} #% increased Damage While Leeching
______________________________________________________
Ideally you want to avoid needing more than 1 All Attributes roll on your necklace. This way you can get Crit / Crit Multi / High Life & An open prefix to craft Damage while leeching and then catalyze Criticals. However, resistance capping prioritizes always.
Rings
Rare Rings
______________________________________________________
Implicits
______________________________________________________
- 🛡️ +#% Chaos Resistance
- 🛡️ +#% Elemental Resistances
Explicits
______________________________________________________
- 🗡️ Curses Enemies with Vulnerability on Hit – On one of the rings
- 🛡️ +#% to Chaos Resistance
- 🛡️ +#% to Elemental Resistances
- 🛡️ +# to Maximum Life – Ideally > 95
- 🗡️ {Benchcrafts} #% Increased Damage
______________________________________________________
Weapon
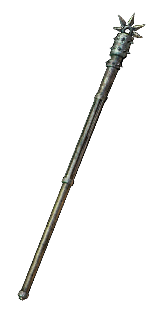
Rare Staff – This needs to be an  Ezomyte Staff
______________________________________________________
Explicits
______________________________________________________
- 🗡️ #% Increased Attack Speed
- 🗡️ #% Increased Physical Damage
- 🗡️ Adds # to # Physical Damage
- 🗡️ #% Increased Critical Strike Chance
______________________________________________________
_Crafting Guide: Buy an  Ezomyte Staff with T1 or T2 Fractured Attack Speed and spam Essences of Contempt (as high as you can afford) until you hit Hybrid Phys and clean up the item. You can remove suffixes with prefixes can’t be changed, scour or use Annulment Orbs for prefixes. You want to end up with 3 modifiers, Hybrid Increased Phys/Accuracy, Attack Speed, Flat Physical Damage. Then you craft “Can have up to 3 Crafted Modifiers” and craft Increased Physical Damage & Critical Strike Chance (ideally the betrayal mod which grants Strength and Intelligence as well to ease up attribute Requirements).
Flasks
Be sure to check out our Flask Crafting Guide to learn everything you need to know about how to set up your non-Unique Flasks.
______________________________________________________
 Quicksilver Flask,
  Diamond Flask,
  Granite Flask,
  Rumi's Concoction,
  Divine Life Flask
All Prefixes
______________________________________________________
- 💎 Gain # Charges when you are Hit by an Enemy (Utility Flasks)
- 💎 Instant Recovery when on Low Life (Life Flasks)
Explicits
______________________________________________________
- 🛡️#% Increased Armour Rating during Effect (Utility Flasks)
- 🛡️#% reduced Effect of Curses on you during Effect (Utility Flasks)
- 🛡️#% Increased Attack Speed during Effect (Utility Flasks)
- 🛡️Grants Immunity to Bleeding for # seconds if used while Bleeding (Life Flask)
______________________________________________________
Jewels
Regular Jewels
Regular Jewels can have a multitude of relevant damage modifiers. The modifiers above state a priority list. Obtaining jewels with 3 stats should generally not be hard.
Regular Jewels
______________________________________________________
Explicits
______________________________________________________
- #% Increased Maximum Life
- +#% to All Elemental Resistances – Easy way to get Resistances
- +#% to Melee Critical Strike Multiplier
- #% Increased Attack Speed
______________________________________________________
Current Challenge League Powercreep
coming soon


